In our previous post we explored the basics of the Amazon S3 Storage functionality and explored how to create a Bucket and upload and download files from the S3 Account. In this post we explore how to grant permissions to the S3 bucket. I use AWS S3 for a number of reasons such as storing backups, moving files from different accounts for SSIS ETL processes. The file upload and download speeds within AWS is super-fast and this comes in very handy when moving files across geographies. This is also used as a form of CDN in some cases. Combined with the uptime SLA provided there are a number of cases where S3 Makes sense for DBAs however all this is moot without security so here we explain the different ways to implement it.
The best and recommended way to assign permissions within AWS is the use IAM or Identity and Access management, which is visible as shown below after logging into the console.
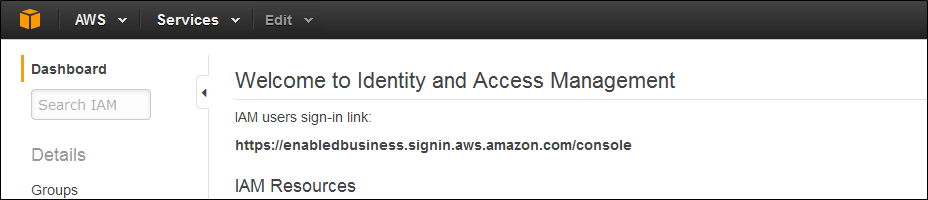
Create a Sign in link
Once you visit this link there are a few steps to perform to create a user. First we will need a login page so that users can access the AWS console without having to register and create an AWS account. This link is created by default and can be found on the Dashboard main page. Note that I have created a link with my company name but you can do the same too by clicking the customize button to the right of the link (not shown here). This link needs to be passed on to users in order for them to be able to connect to AWS and access the S3 Account.
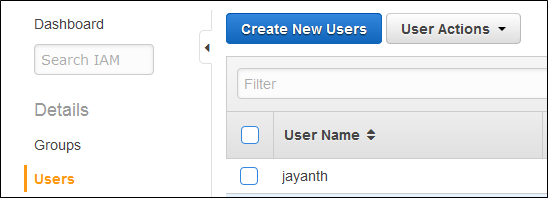
Create a User
To create a User you can click the Users Link on the left hand side menu as shown below, click the Create New Users Button:-
Next enter the username for the user that you would like to create, note the checkbox at the bottom this will create Access keys for the user. An Access key is a unique AlphaNumeric Key used by AWS to identify this user when calling RestAPIS or AWS Cli for automated processed like downloading files from a S3 bucket automatically. We will use this key later for automating uploads / downloads.

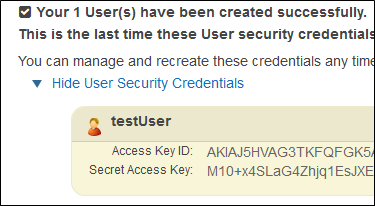
Press the Create button on the bottom right corner of the screen. On Successful creation you will see the below screen which shows the user key etc. make a note of this and don’t loose it.
Press the Close button the bottom right corner of the screen. Once you’re redirected back to the User screen you can see the user listed, click the username

On the below screen we can configure number of important properties for the users, make a note of the User ARN, this is used by AWS to uniquely identify a user within AWS. It will be required when granting individual permissions to a specific user. If you didn’t check the box in the previous screen you can create it by clicking the Create Access Key button as shown below. With the username created you need to assign a password to the use so, click Manage Password button. You can also use Multifactor authentication a paid feature in Azure when asking users to sign in to AWS. Additonal support exists for users logging in using a certificate.
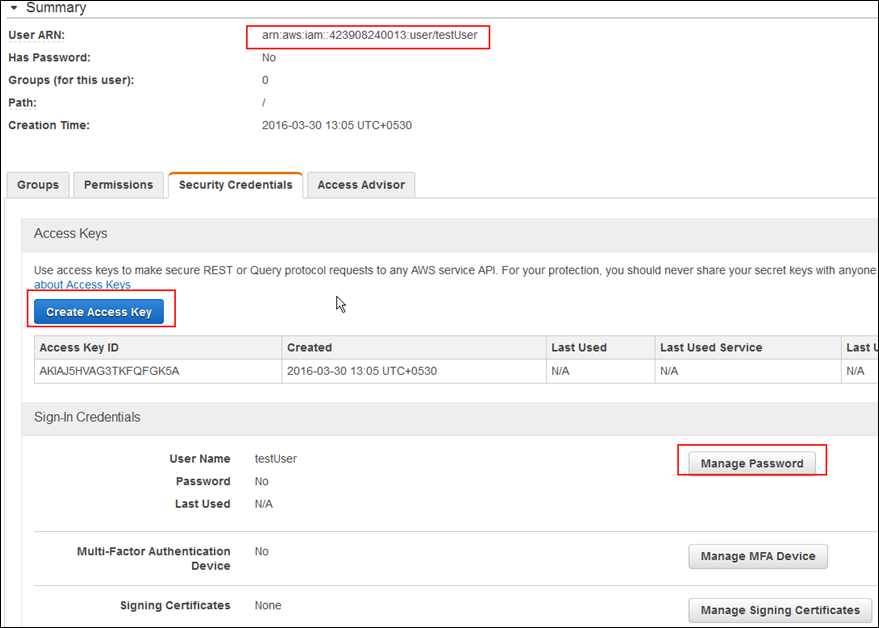
Enter a new password and press Apply on the bottom right corner. With this we have finished creating the user.

How to create a S3 Admin Account where a user can manage just S3
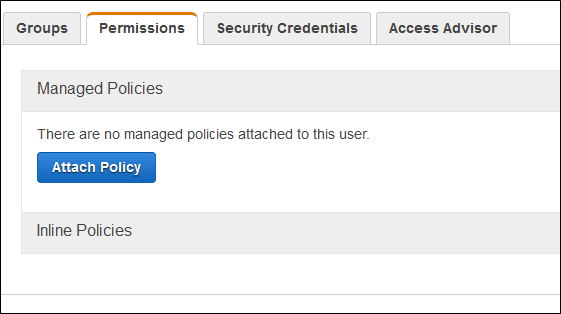
On the user management page click the Permission tab and click the Attach Policy button. In this case we are granting permissions on the AWS Service level and not object level. A Service level is a permission granted at the S3 service level in this case. So the user can manage my S3 account and all buckets and objects (files within those buckets).
On the below screen type the name of the service you want to grant permission to see a list of allowed permissions check the permission you want to grant.
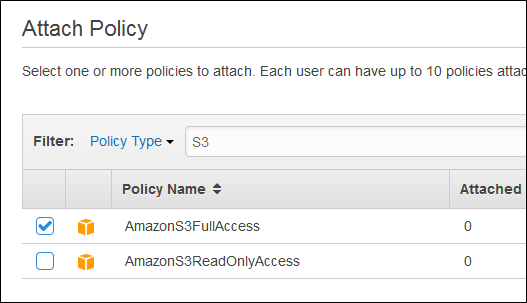
Press the attach policy button on the bottom right corner.
You can test the above permission by going to the url mentioned earlier in this post.

As you can see since the account is an admin it can upload / download files etc.

Note what happens when I try access another service to which I do not have permissions

How to create a Public S3 Bucket
Now occasionally you might want to have the S3 account made public so that anyone can upload or download files from the S3 bucket.
In this case you do not need to create users since the purpose is to not have users login and be able to access files anonymously. A common place where this is found is for images to be downloaded from email newsletters etc. But there are obviously other use cases as well. In this case you can simple click the bucket (for details on how to access bucket visit this previous post). In the below screenshot I create permissions so that users can download a doc file from my S3 Bucket. First Click the file then select properties and under permissions tab Add Everyone and add permissions to Open/Download. The link can then be passed to end users to allow them to download the file without having to login or creating users as shown in the previous steps.
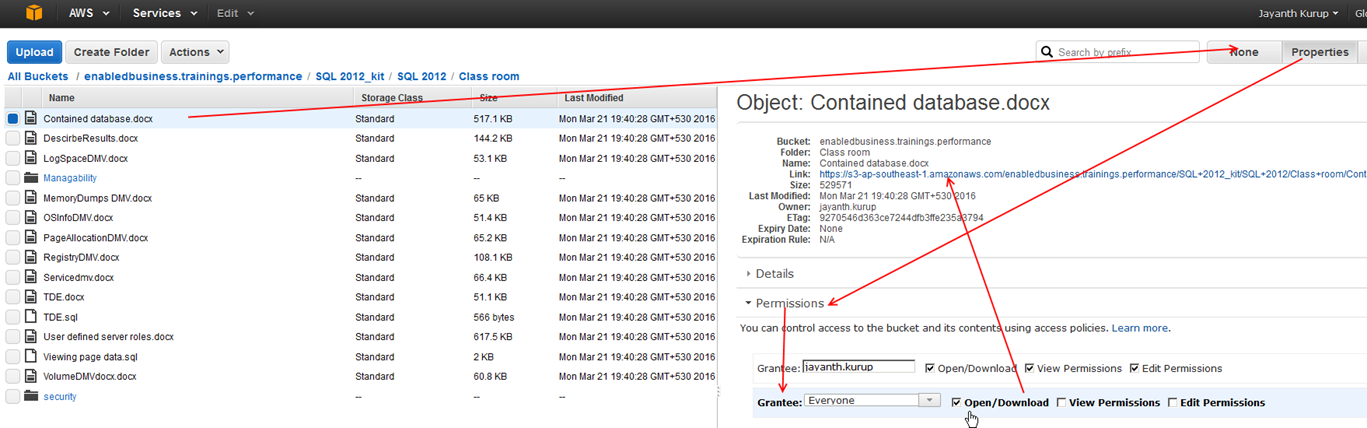
Click Properties as shown in the top right corner of the screenshot and then Under the permissions tab click add more permissions and select Everyone and add permissions are required followed by Save.
In our next post we take security one step further by assigning permissions such that one user can access just one bucket and only download files from the bucket.
In our next post we explore how to download / Upload a large number of files into AWS S3 Storage using Command Prompt.
Please Consider Subscribing