Microsoft Azure has become a cloud platform of choice for everyone at this point. One of its biggest advantages has been the ability to integrate seamlessly with existing enterprise solutions and on-premise systems. However, when it comes to file storage AWS has always had a leg up because of its S3 storage. Microsoft blob storage is definitely a contender now that we have integration with Azure Data Lake as well as integration with Azure Data Factory and a much more robust security system. In spite of all these cloud-based options a number of companies still prefer to use FTP sites instead. We had one similar requirement recently where we needed to provide a secure FTP site or SFTP site for a client. It is important to understand the difference between FTP FTPS and SFTP. A FTP site is what most people understand when they talk about a file share server sitting on the cloud. It simply allows data transfer to and from an FTP server using an unsecured protocol very similar to how you access a website using HTTP instead of HTTPS. FTPS on the other hand while using the same protocols now encrypts the data via it’s a secure connection between the client and the server. On the other hand, we also have secure FTP or SFTP which is can be considered the Linux version of how this would have been implemented except that it doesn’t use File Transfer Protocol. SFTP uses SSH and encrypts data as well even if it uses a different protocol. While the client did require a secure FTP or SFTP site; while researching the available options we did encounter an interesting scenario in Azure for creating FTPS sites. In this post we cover in detail the steps required to simulate that kind of environment
Using the below link you can launch the template to create and SFTP site in Azure in a matter for minutes
https://docs.microsoft.com/en-us/samples/azure-samples/sftp-creation-template/sftp-on-azure/
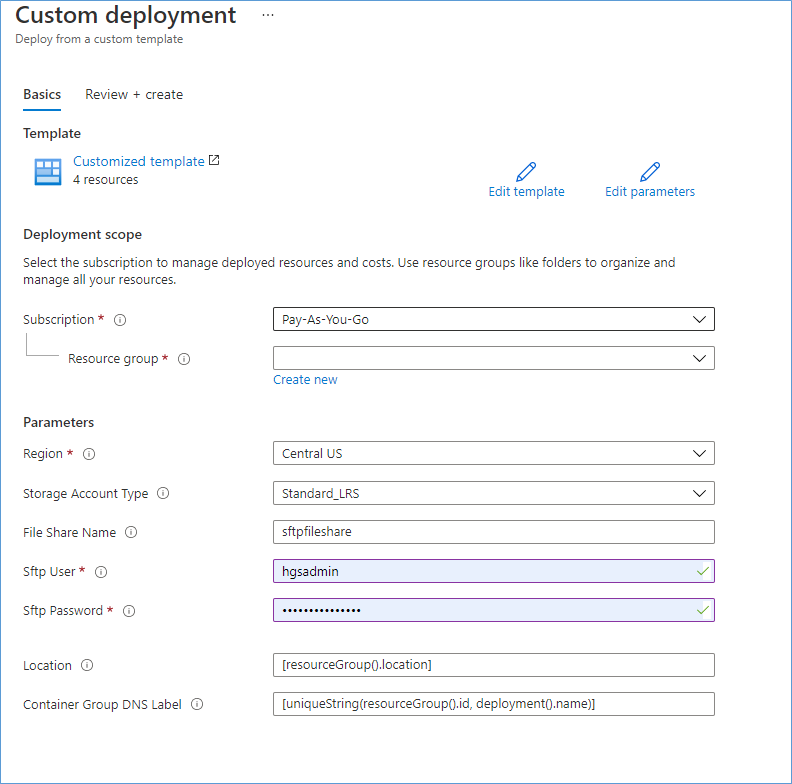
Simple type in the Resource Group name and the user name and password for the SFTP site. Followed by clicking the Review and Create button at the bottom of the screen.
Simply click Create at the next screen and the template will take it from there.
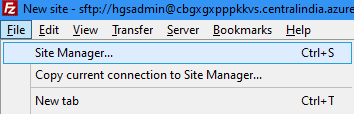
In order to test the connection to the SFTP site will need a third party tool like FileZilla. Which can be downloaded from here.
Once the resource is created you should see the below screen
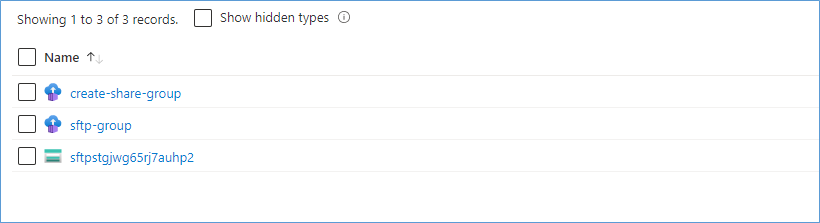
Click the service that has sftp-group in the name to navigate to the screen below

If the resource isn’t started already click the start button on the top of the window. Else make a note of the FQDN which will serve as your URL to access the site.
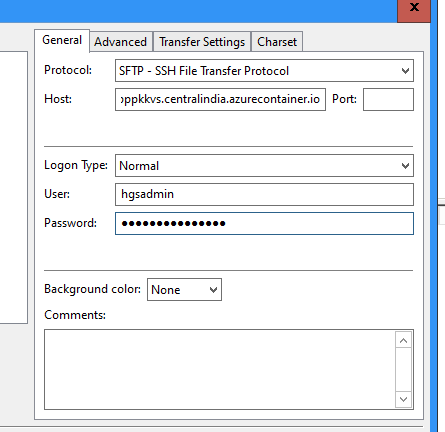
Launch Filezilla as shown below and simply enter the credentials and the url to the sftp site.
Since Filezilaa support multiple types of connections you will need to setup you connection via the File>Site Manage window as shown below.
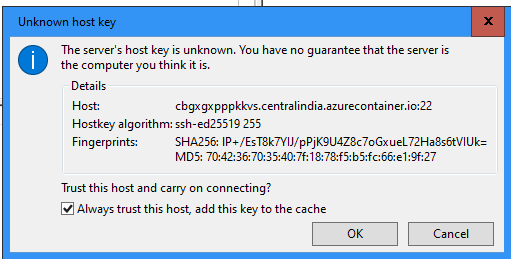
When establishing a connection for the first time you may see the below message asking if you want to trust the host and it’s key. Press OK.
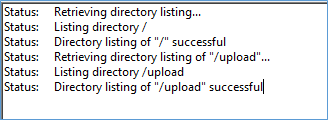
Once connection is established properly you will start seeing entries like the one below in the Status Window of FileZilla as shown below
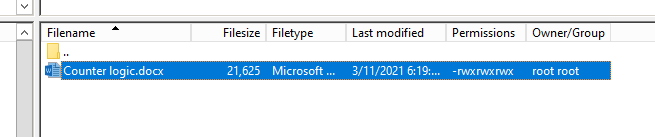
Move files from the left hand side explorer to the right and you are done
And that’s all there is to it. The simple and easy way you can setup and get started with a SFTP site makes this option very useful for teams that want a similar service without all the Bells and whistles of a Blob Storage account etc. I often find myself having to use this setup with large companies who have some interia moving to the cloud and prefer certain things be done the old way

Please consider subscribing !