Today we are going to look at the different steps involved in installing SQL Server 2014. The important thing to keep in mind here is that while the steps are the same as that used for SQL 2012 , we still need to pay attention to why we select certain options at different stages. While it would be better to provide a pre install and post install checklist we are focusing only on the actual installation here and will cover some best practices as we go along.
Locate and run the installer and click “Run Setup.exe”
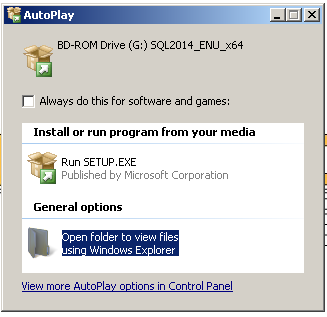
We are using an iso file here. As mentioned in one of our previous blogs on extracting SQL 2012 cab file you will remember that extracting using Winzip doesn’t result in proper installation because a few binaries are not extracted. Try using 7Zip or WinRar.
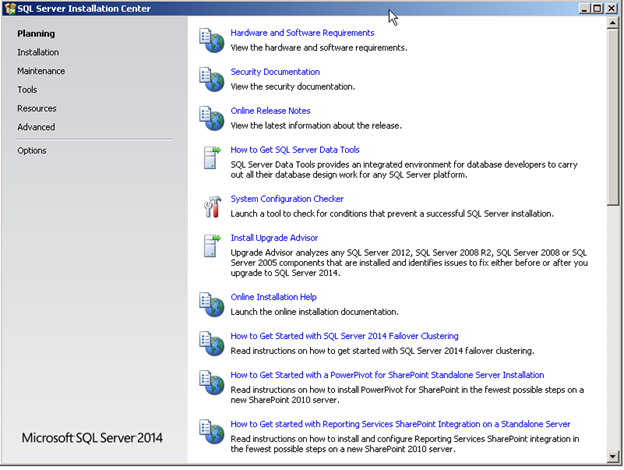
On the landing page , we highly recommend you review the links provided to learn more about the best practices and pre requisites. Click Installation on the left hand side menu
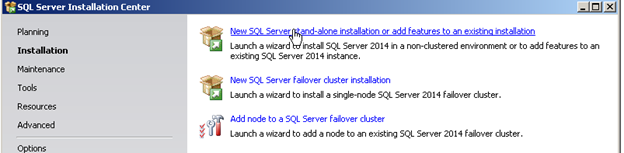
Click New SQL Server standalone installation or add features to an existing installation.
This will be followed by the below screen
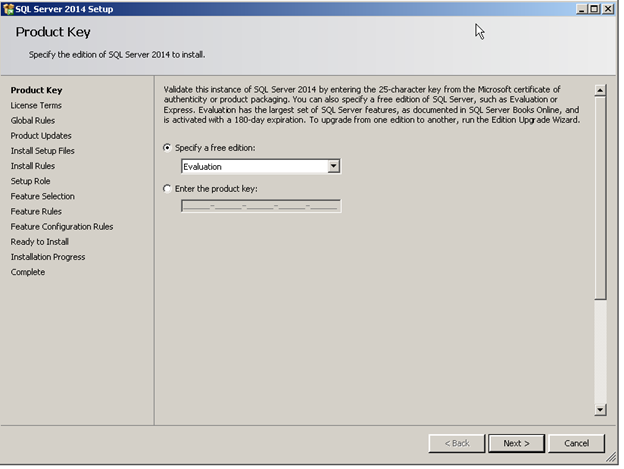
On the below screen, enter the product key if you have one, else select evaluation edition and we will show you how to upgrade to the licensed version later.
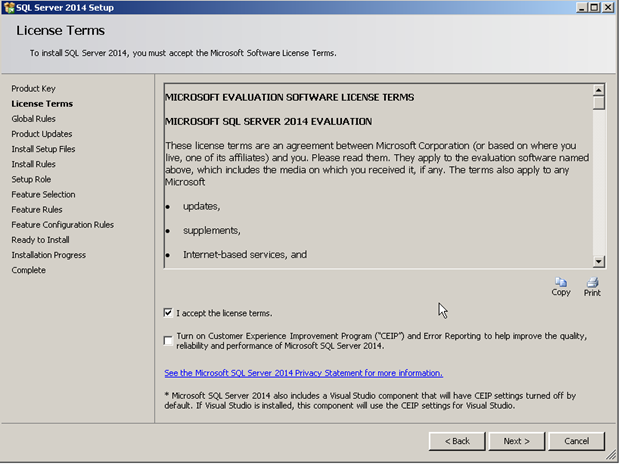
Accept the terms below
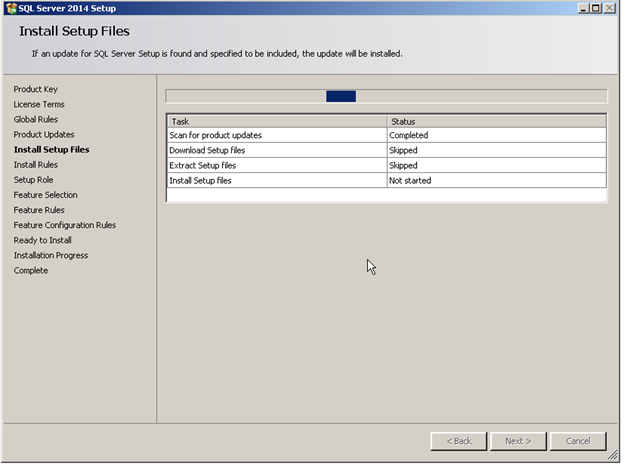
The next screen begins the installation of a few files that are required in order for the setup file to work properly.
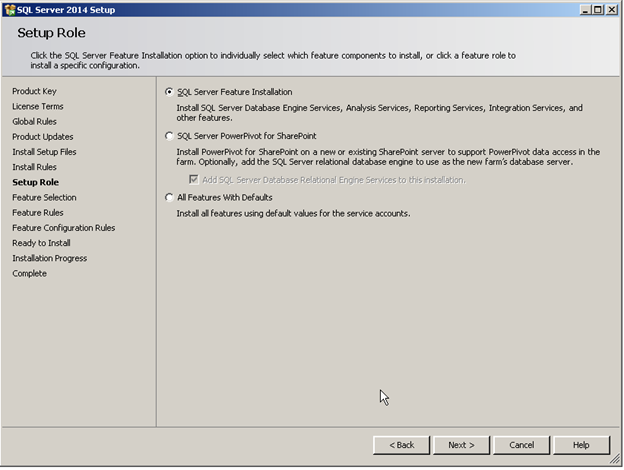
On the below screen we have the options similar to 2012, select the first option to see which features are being installed. Select the second option if you want to integrate SQL with SharePoint and provide direct access to Analysts using power pivot for SharePoint.
On the below screen you will need to select( check or un check) features that you want to install.
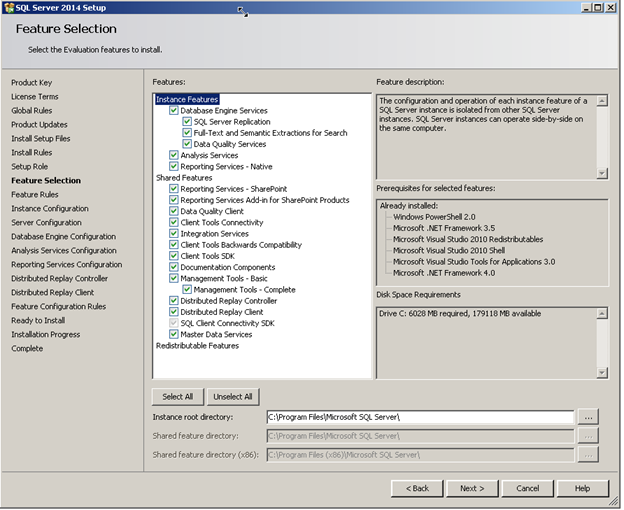
Those who remember the options from SQL 2012 will notice that there are no new features listed. However there are significant improvements to how the existing relational database works. Think of it as the difference between and iPhone 5 and iPhone5S, while begin different phones in their own right they 5S is just a better version of the iPhone5. Why is this important? If MS is following the same Tick Tock model that hardware manufacturers are using then it makes sense for users to wait for the Tock. Press Next.
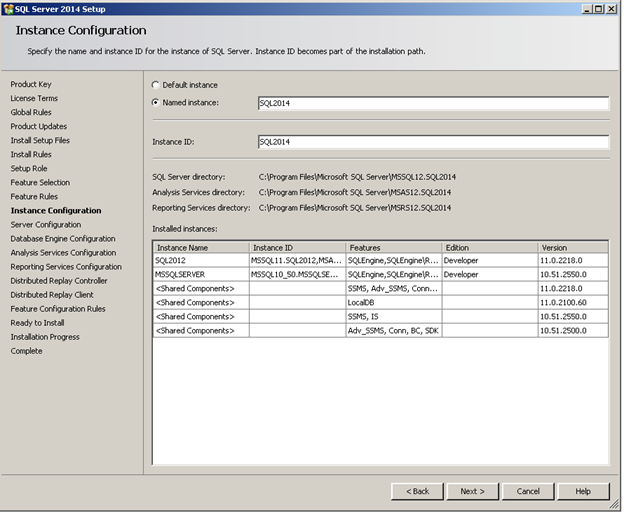
On the below screen you need to enter the instance name. If this is the first time SQL is being installed on the hardware select default instance, else enter an instance name that is relevant and press Next. The bottom half of the screen shows instances that are already installed.
On the service account screen, you can leave the accounts as they are (these are managed accounts used explicitly for services, a feature that is available since windows server 2008 R2). Ideally the minimum permissions need to run SQL Server database services are: – Access to registry, Access to disk drive where database files is located, log on as a service, Lock pages in memory (optional but a bets practice). Any other permission purely depends on what is trying to be achieved.
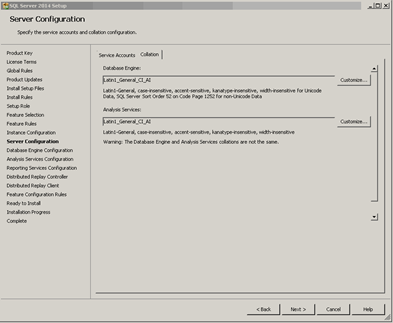
On the top tab where is says collation, please select it and change it to Windows collation.
|
|
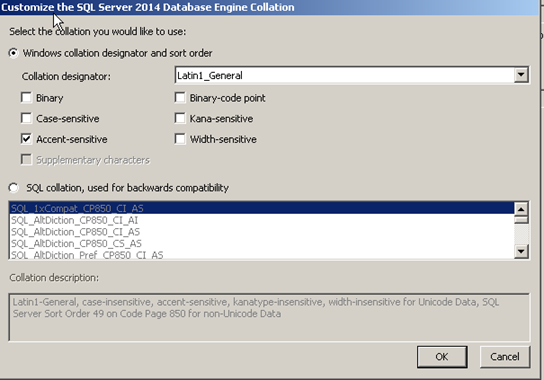
Press OK followed by Next
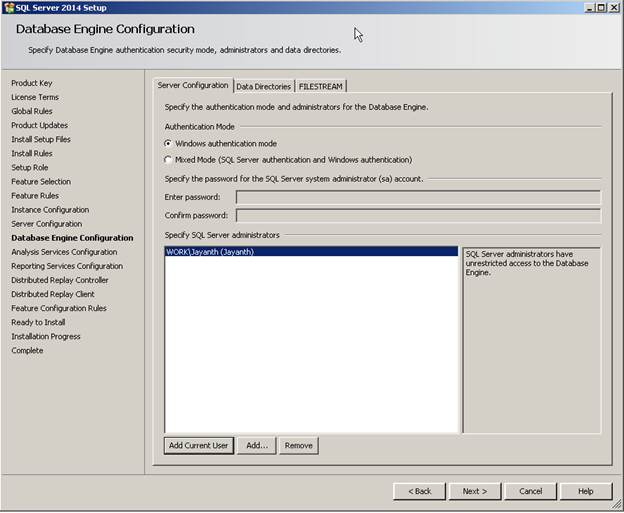
On the below screen, Click Add Current User. Do not enable Mixed mode unless you have a need to work with heterogeneous environments like Oracle running on Linux(hence no windows authentication).
|
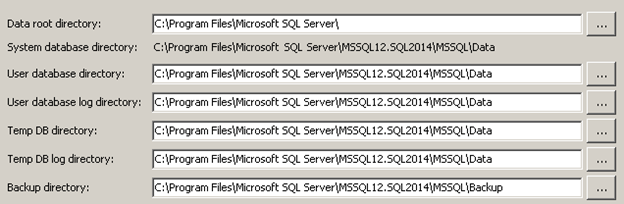
Select appropriate locations for each file. We will cover best practices for IO in a later series. You get to this screen by Click the data Directories tab on the top |
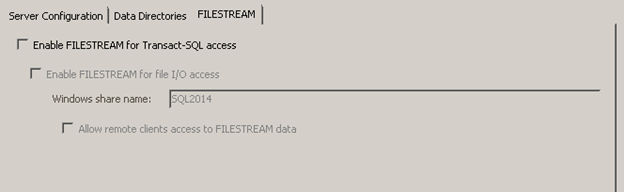
If you use File Stream you can enabled it here or at any point later by going into the SQL Server Configuration Manager. Watch our series on FileStream and Filetable for SQL 2012. |
Press Next. At this point we are done configuring the relational database engine for SQL Server. We now move on to the Analysis Services or OLAP portion of it. A best practice is never to install OLAP and OLTP on the same hardware. They have different workloads and ways of working and often are at odds with each other. SSAS or SQL server Analysis Services comes with two models since SQL 2012. The Multi-Dimensional model has been the mainstay for almost a decade now but the new Tabular model offers more flexibility. We will cover SSAS in detail in a later series. For Multidimensional Cube model please visit out blog on SQL 2012. In this edition we will focus mainly on the Tabular model either way for the purpose of the installation it is simply a matter of selecting the appropriate radio button. Please note Cube cannot be deployed on SSAS configured for tabular mode or vice versa.
|
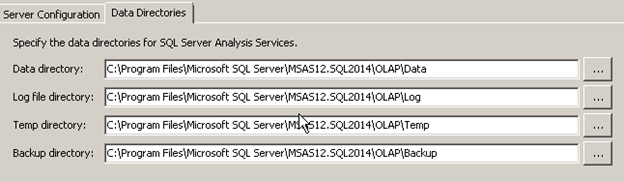
Change directories as needed. When processing very large OLAP systems the temp Directory usually requires large amounts of space. |
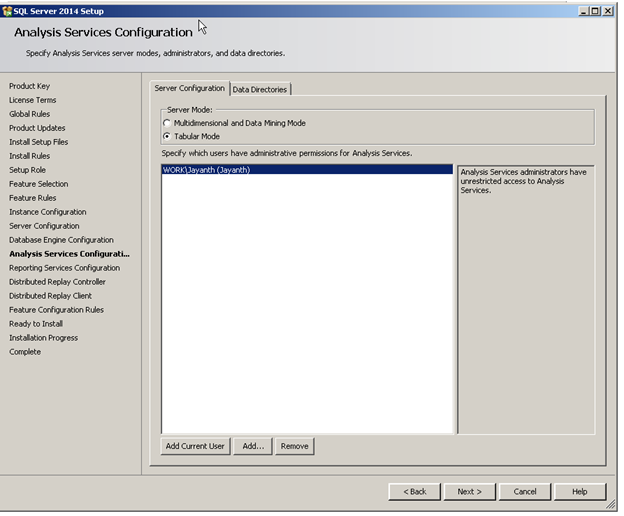
Add Current User (SSAS support only windows authentication) and press Next
With this we finish configuring SSAS and move on the configuring SSRS.

On the above screen select the first option to Install and configure SSRS so that it is ready to use. The second option is often used when we are setting up a SSRS for scale out deployment. The third option is used when SSRS is integrated with SharePoint in which case administration and configuration is handled within SharePoint. Select the first option and press Next.
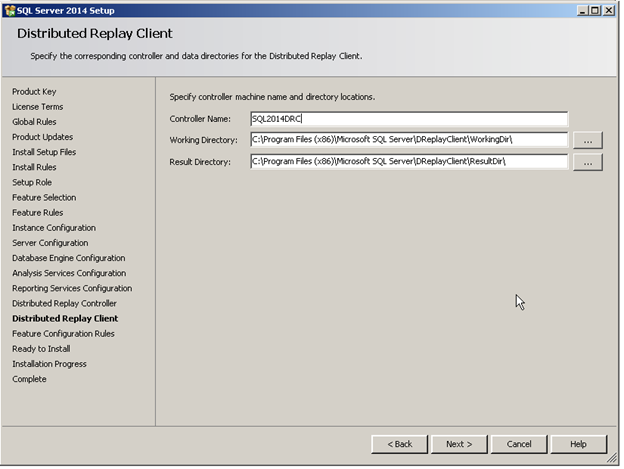
With this we are done configuring SSRS and move on the setting up Distributed replay controller. It allows you to recreated parallel workloads on your hardware.

Press Next after Adding the Current user and then Enter name for the controller here. The DRC is a shared component and is installed once.
Press Next and move on the summary screen. Here you will see a summary of all the options selected by you in the previous steps. Please make note of the path at the bottom on the screen in case you need to perform additional installations in exactly the same manner as you just did.

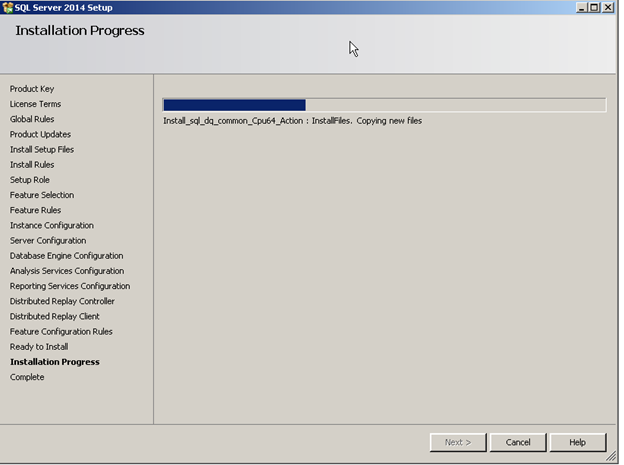
Press Install to start the installation and view the progress bar. Installtion takes about 15-20 min depending on the hardware & features selected.
Once the installation is complete you should be seeing the below screen.
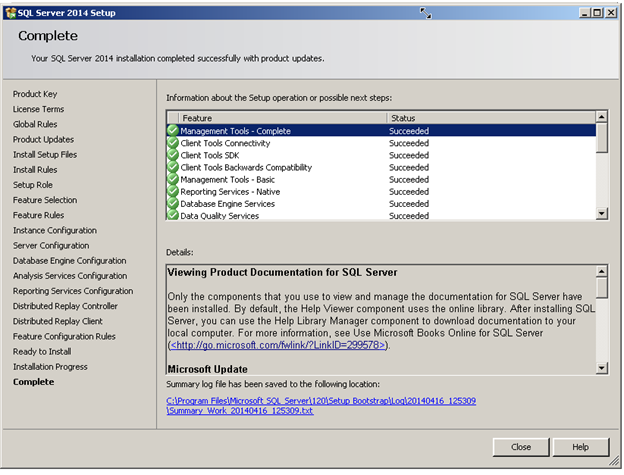
And that’s it.
Below are a few popular post-install checklists
http://www.sqlskills.com/blogs/jonathan/sql-server-installation-checklist/
http://www.sqlservercentral.com/blogs/jonrussell/2014/04/01/sql-server-installation-checklist/
http://www.brentozar.com/archive/2008/03/sql-server-2005-setup-checklist-part-1-before-the-install/
Please Consider Subscribing